Previously I described how to create CI/CD pipelines for Power Platform solutions (and reference data) using Azure DevOps.
The YAML pipelines that I created were deliberately self-contained to allow you to easily copy and adapt them for your own solutions.
However, an enterprise with many Power Platform solutions to deploy needs a scalable approach. These are my recommendations:
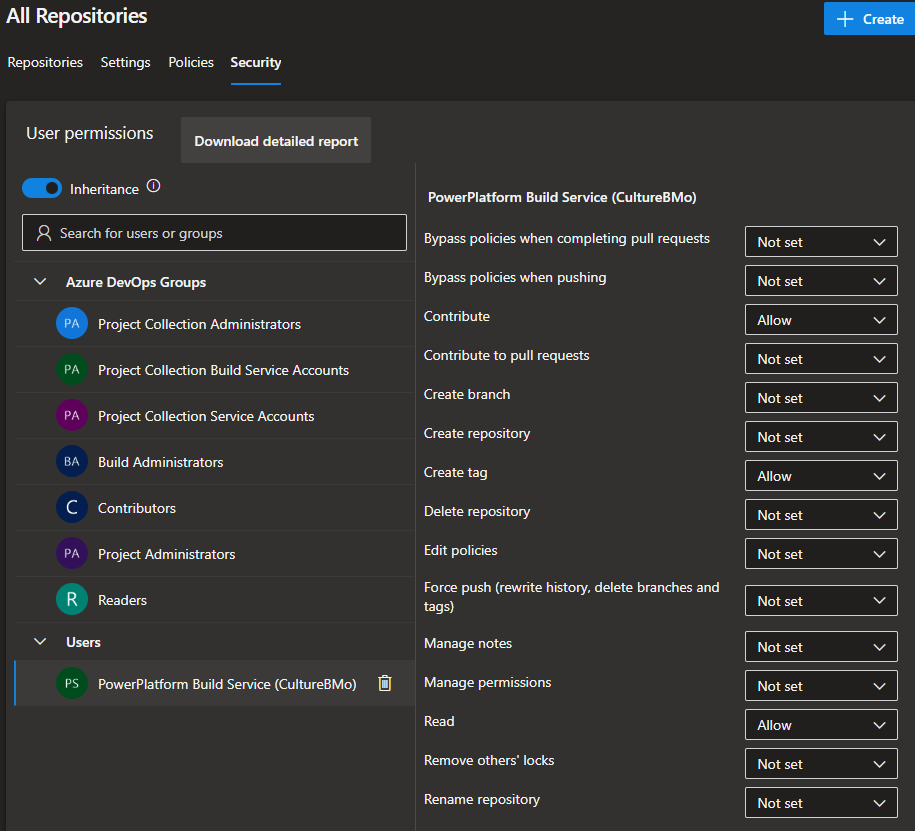
The last tip is to make repo set up easier. Under Project Settings > Repositories > Security, for the Build Service account, set the Contribute permission to Allow. This saves you having to set it for each repo.

All the templates and an example of a specific solution implementation are on GitHub.
The YAML pipelines that I created were deliberately self-contained to allow you to easily copy and adapt them for your own solutions.
However, an enterprise with many Power Platform solutions to deploy needs a scalable approach. These are my recommendations:
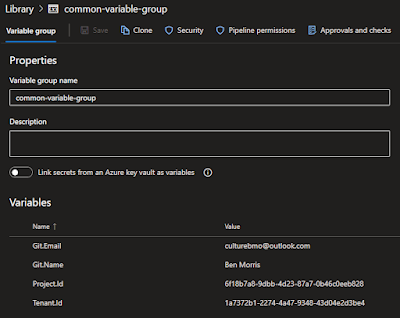
- Move variables for your specific implementation into Azure Pipelines Library variable groups. I created a common variable group to hold:
- The email and name used to commit to source control
- The ID for the Azure DevOps project
- The ID for my Azure tenant
- Create variable groups for each of your Power Platform environments, e.g., Dev, Test, UAT and Production. These groups should contain:
- The ID of the AAD App Registration that has System Customizer permissions in that environment. Rather than using a single App Registrations across all my environments, I created a new App Registration for each environment
- The secret for that App Registration
- The URL for the Power Platform environment

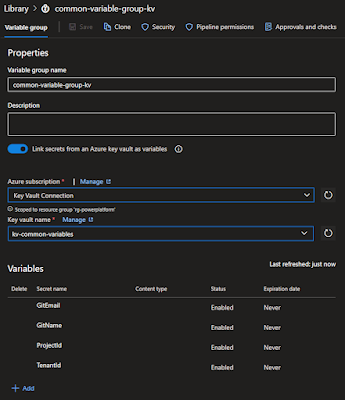
- Or better still, use an Azure Key Vault to store these values and link them to Azure DevOps
- Now create templates that can be reused for all your solutions. I created a new Templates repo and added 4 templates:
- A template to Commit and CI solutions – that references my common and dev variable groups
- A template to Release solutions to my environments – referencing my common, test, UAT and production variable groups
- A template to Commit reference data
- A template to Release reference data
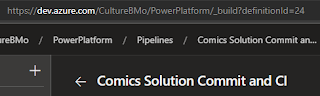
- For each solution my YAML pipelines could then be simplified – essentially just passing the solution name to the appropriate template and letting it do all the work. The only other value needed is in the Release pipeline for solutions – where you need to pass the pipeline number from the corresponding Commit and CI pipeline. This can easily be found: as the definitionId in the URL for the Commit and CI pipeline.
- Test to make sure you haven’t broken anything


The last tip is to make repo set up easier. Under Project Settings > Repositories > Security, for the
All the templates and an example of a specific solution implementation are on GitHub.
Comments
Post a Comment